
To troubleshoot plumbing issues in your home, follow these steps:
- Replace worn faucet parts.
- Patch or clamp small leaks.
- Swap the flapper and adjust the float.
- Clear drains with a plunger or snake.
- Clean aerators and open valves.
- Clear toilet clogs with a plunger or auger.
- Reset the heater and flush sediment.
- Clean or replace shower washers.
- Tighten fittings or replace valves.
- Clear the main line at the cleanout.
- Warm frozen sections slowly.
- Replace damaged outdoor lines.
- Install new shut-off valves.
- Clean the pit and test the pump.
- Flush taps and clean the heater.
Homeowners often deal with plumbing issues caused by hard water, aging copper pipes, and sudden temperature shifts. These everyday problems can start small but lead to wasted water supply and costly damage if ignored. Learning how to spot signs early, like slow drains, dripping fixtures, or low pressure, can save time and money. This guide offers practical troubleshooting steps and easy fixes that help keep your home’s plumbing system running smoothly.
Call (830) 331-2055 today to get quick, reliable plumbing service from our trusted local team.
How to Troubleshoot and Fix Common Plumbing Problems
To troubleshoot common plumbing problems, check for moisture, slow drains, dripping faucets, and running fixtures.
Next, look for weak water pressure and inspect exposed lines. Also, clear clogs with simple tools and flush sediment from the heater.
Replace worn parts like valves, washers, or flappers. Finally, test the sump pump and check for outdoor leaks before heavy rain.
Below are 15 practical plumbing problems and solutions every homeowner can handle before calling a professional.
1. Fix Leaky Faucets Early to Stop Drips and Water Waste
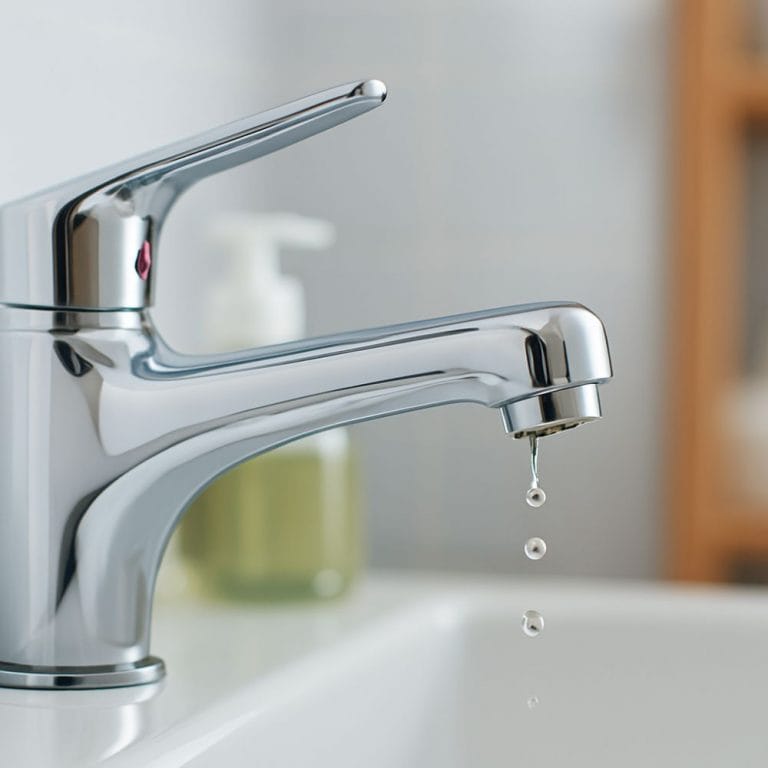
A leaky faucet means worn parts let water drip. To stop the problem, replace the failed seal or cartridge.
What to Check:
- Turn the faucet off and watch the spout for a drip.
- Wrap a dry tissue around the spout. Check for moisture.
- Touch around the handle base. Check for water.
- Open the cabinet and feel the supply lines and valves.
- Unscrew the aerator. Look for grit or scale.
How to Fix It
- Close the hot and cold supply valves under the sink.
- Plug the sink so parts do not fall in.
- Remove the handle and trim with a screwdriver.
- Pull the stem or cartridge. Note brand and size.
- Replace the O-ring or the cartridge with a matching part.
- Reassemble. Open valves. Run the tap for ten seconds.
- Check the faucet and supply lines for moisture.
2. Repair Leaking Pipes Fast to Prevent Moisture Damage
Leaking pipes show wet spots or slow drips at joints. To stop the leak, first isolate the water supply, then patch or replace the pipe.
What to Check:
- Turn off all faucets. Listen for a faint hiss.
- Scan walls, ceilings, and cabinets for stains.
- Wipe all visible pipes and valves with a dry cloth.
- Check the meter. If it moves, water is leaking.
- Mark the wet area with tape for reference.
How to Fix It
- Shut the main water valves at the meter or curb box.
- Open a sink on the lowest floor to relieve pressure.
- Dry the pipe. Lightly sand shiny spots for grip.
- For a pinhole, wrap the pipe repair tape tightly for six inches.
- For a split, install a push-fit coupling or a repair clamp.
- Open the main valve. Watch for any new dripping for five minutes.
- Replace long, damaged sections as soon as possible.
3. Replace Toilet Parts to Stop Running Water and High Bills
A running toilet means that the seal is weak. To fix the issue, replace the flapper and set the water level.
What to Check:
- Remove the lid. Watch the water level after use.
- Press the flapper down by hand. If the flow stops, the flapper leaks.
- Lift the float. If the flow stops, the fill valves are working.
- Check the chain. It should not be tight or tangled.
- Look for water trickling into the overflow tube.
How to Fix It
- Close the toilet supply valves. Hold the handle to empty the bowl.
- Sponge out the remaining water inside the bowl.
- Unclip the flapper. Take it to match the size.
- Clip on the new flapper. Leave a little slack in the chain.
- Set the float so water stops below the overflow tube.
- Open the valves. Do two complete flushing cycles.
- Listen for silence. Check the bowl for water movement.
4. Clear Clogged Drains to Restore Smooth Flow in Sinks and Tubs
A clogged drain slows or stops water flow. To clear clogs, use a plunger, a hand snake, and a clean trap.
What to Check:
- Run the tap for ten seconds. Note how fast it drains.
- Check if other drains have the same problem.
- Remove the stopper or strainer.
- Shine a light down the pipe opening and look for hair or debris.
- Feel the trap under the sink. It may feel heavy if packed.
How to Fix It
- Fill the basin with two inches of water.
- Seal the overflow with a wet cloth.
- Place a cup plunger over the drain. Plunge for 20 strokes.
- If slow, remove the trap with slip nuts. Empty into a bucket.
- Feed a hand snake into the wall opening until resistance eases.
- Reassemble the trap. Run hot water for one minute.
- Clean the stopper and reinstall it.
5. Improve Low Water Pressure by Cleaning Blockages and Opening Valves
Blockages or leaks can cause low water pressure. To raise the flow, clean aerators and confirm that the valves are open.
What to Check:
- Test several sinks and showers. Note where pressure is weak.
- Compare hot and cold at the same fixture.
- Check the main shut-off valve by the meter.
- Check the valves on the water heater.
- Remove a faucet aerator. Look for grit or scale.
How to Fix It
- Soak aerators and showerheads in vinegar for one hour.
- Brush openings with an old toothbrush.
- Open the main and all fixture valves fully.
- Flush lines by running the tap for two minutes.
- If pressure is low in the whole house, install a pressure gauge.
- If pressure swings or drops, plan a pressure valve service.
- Repair any leaks you found during checks.
6. Remove Toilet Blockages Safely to Avoid Overflows
A clogged toilet blocks the outlet path. To clear it, use a plunger or a toilet auger to move the blockage.
What to Check:
- Do not flush again. Wait one minute.
- Remove the tank lid. Close the supply valve if the bowl rises.
- Check other drains. If they back up, the problem is larger.
- Lay towels around the base for splash control.
How to Fix It
- Use a flange plunger. Cover the outlet fully.
- Push down slowly. Pull up fast. Repeat 15 times.
- If no change, insert an auger into the outlet.
- Turn the handle. Pull debris back.
- Open the supply valve. Do a gentle test flushing.
- Repeat once if needed.
- If clogs return often, schedule a sewer cleanout and camera check.
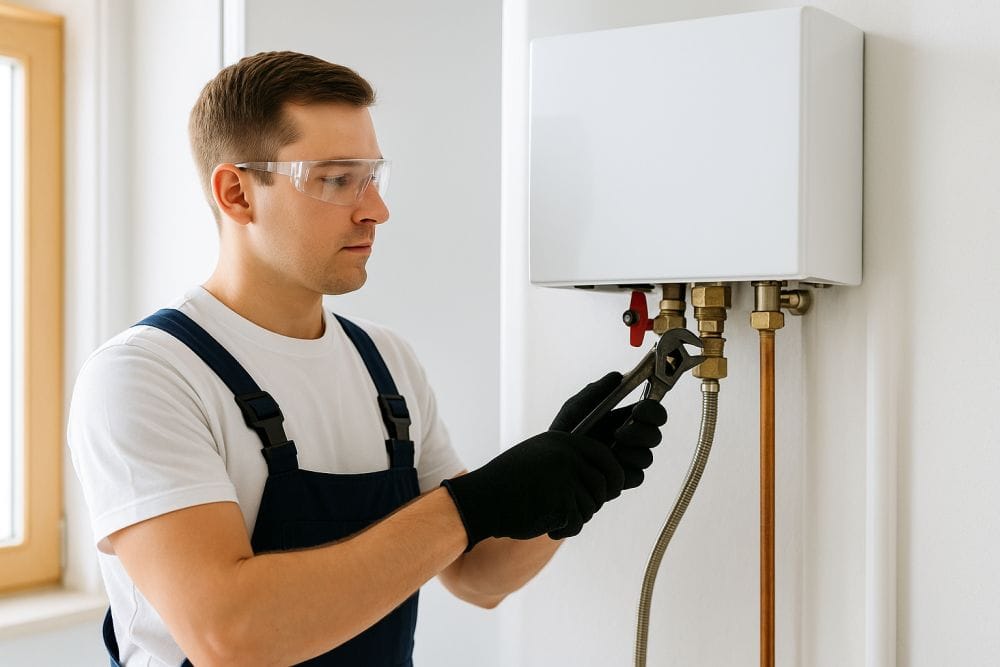
7. Restore Hot Water by Checking Power, Gas, and Sediment
Not getting hot water points to power, gas, or sediment. To restore hot water, reset the power, and flush the unit.
What to Check:
- Try hot water in the sink and in the shower.
- Check the breaker for an electric heater.
- Check the gas control and pilot for a gas heater.
- Look for a damp area around the base of the heater.
How to Fix It
- Turn off the power or gas. Close the cold inlet valve.
- Attach a hose to the drains. Run it to a floor drain or outside.
- Open the drain and a hot faucet. Drain until clear.
- Close the drain. Open the cold inlet. Fill the tank entirely.
- Restore power or relight the pilot as directed on the label.
- Wait for a complete heat cycle. Test a shower.
- Replace the heater if it drips or the water stays cold.
8. Stop Showerhead Drips by Cleaning Parts and Replacing Washers
A dripping showerhead means a weak seal or debris in the head. To stop the drip, clean parts and replace worn washers.
What to Check:
- Turn the shower valve off. Watch for steady drips.
- Hold a tissue to the shower arm threads.
- Try other showers to see if the issue persists.
- Note the valve brand if a cartridge may be needed.
How to Fix It
- Turn off the bathroom water valves if present.
- Unscrew the showerhead. Remove the old washer.
- Soak the parts in vinegar for one hour.
- Wrap thread tape on the shower arm.
- Install a new washer. Reattach the head.
- Turn the supply on. Test for drips for two minutes.
- If it still drips, replace the shower valve cartridge.
9. Fix Water Heater Leaks to Avoid Tank Failures and Floor Damage
Water heater leaks come from loose fittings or a failing tank. To protect the home, tighten parts or replace the tank.
What to Check:
- Dry the top connections. Recheck for moisture after five minutes.
- Lift the lever on the temperature and pressure relief valve.
- Inspect the drain valves for a slow drip.
- Look for rust streaks on the heater body.
How to Fix It
- Turn off the power or gas. Close the cold inlet.
- Tighten top connections with a wrench.
- Replace leaking drain valves if needed.
- Replace a faulty temperature and pressure valve if it weeps.
- If the tank body drips, replace the water heater.
- After work, open a hot tap. Restore water and power.
- Check the pan and floor for the leak again in one hour.
10. Clear Sewer Line Backups to Protect Drains Throughout the Home
Sewer line problems cause many drains to back up. To protect the home, relieve pressure, and clear the main line.
What to Check:
- Stop all water use. Do not flush any toilets.
- Note which fixtures back up first.
- Find the outdoor cleanout cap near the house.
- Loosen the cap slowly. Listen for air release.
How to Fix It
- Remove the cleanout cap. Allow standing water to drop.
- Feed a rented drain cable into the line toward the street.
- Run the cable until the blockage breaks free.
- Pull the cable out. Clean and repeat once.
- Run a garden hose into the cleanout for two minutes.
- Replace the cap. Test one sink and one fixture.
- If backups return, book a camera inspection to locate the issue.
11. Thaw Frozen Pipes Slowly to Prevent Bursts and Water Damage
Frozen pipes can stop water flow and burst if left unchecked. To fix them safely, warm them slowly until water moves again.
What to Check:
- Turn on faucets to check if water flows.
- If nothing comes out, find exposed pipes in crawl spaces or attics.
- Look for frost, ice, or bulging sections.
- Feel for extremely cold metal areas.
How to Fix It
- Shut off the main water supply.
- Open the nearest faucet to relieve pressure.
- Warm the frozen section with a hair dryer or warm towels.
- Move the heat slowly along the pipe, starting near the faucet.
- When water begins to run, keep the heat on for several minutes.
- Insulate pipes afterward to prevent future freezing.
12. Find and Repair Water Line Leaks to Stop Yard Flooding and High Bills
Leaks in underground water lines waste gallons and raise your water bill. The fix is to locate and replace the damaged section.
What to Check:
- Walk your yard and look for puddles or soft soil.
- Check the water meter for movement when no fixtures are running.
- Note sudden drops in water pressure inside the house.
- Listen near outdoor faucets for hissing sounds.
How to Fix It
- Shut off the main valve.
- Dig carefully in areas where the soil remains wet.
- Clean the exposed section and locate the crack.
- Cut out the damaged piece with a tubing cutter.
- Connect the new pipe using couplings.
- Turn the supply on and check for a leak
- Refill the hole once everything stays dry.
13. Replace Faulty Shut-Off Valves to Regain Proper Control of Water Flow
A faulty valve sticks, leaks, or refuses to close. To fix this problem, replace the old quarter-turn valve with a new one.
What to Check:
- Locate the valve under sinks or behind toilets.
- Turn the handle clockwise. If it spins freely, it has failed.
- Check for drips at the stem or packing nut.
- Confirm the main valve works before removing anything.
How to Fix It
- Close the main water supply.
- Place a towel under the line.
- Use two wrenches to loosen the old valve.
- Clean the pipe threads or compression end.
- Slide on the new valve and tighten the nut.
- Open the main supply and test for leaks.
- Turn the valve on and off twice to verify movement.
14. Test and Clean the Sump Pump to Keep Basements Dry During Heavy Rain
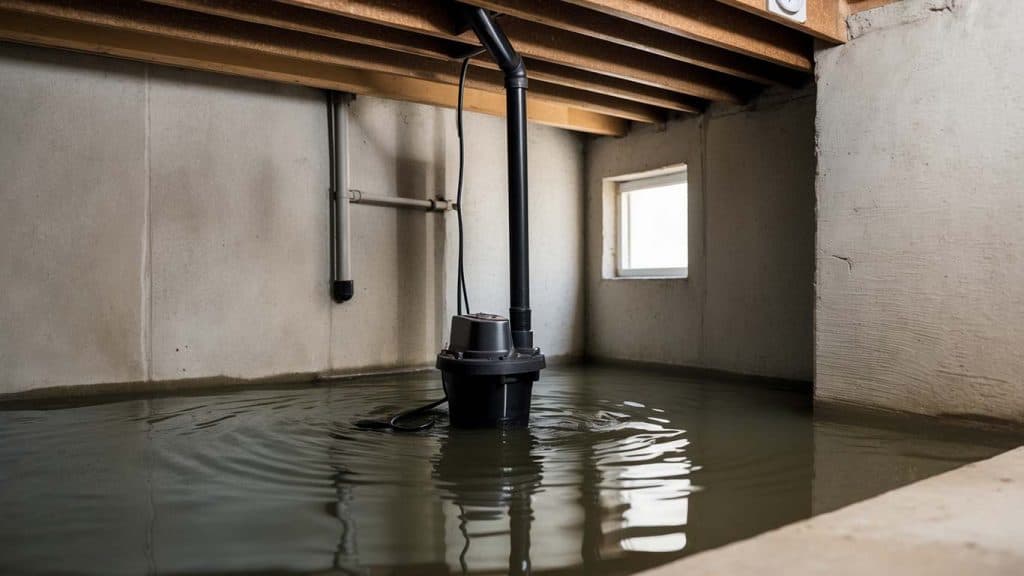
A failed sump pump cannot remove collected water during heavy rain. To fix it, clean the pit and test the pump before storms.
What to Check:
- Unplug the pump. Check for debris or gravel in the pit.
- Lift the float switch by hand to see if it clicks.
- Make sure the discharge pipes are not frozen or clogged.
- Plug the unit back in and listen for the motor.
How to Fix It
- Remove the pump from the pit.
- Rinse the inlet screen with clean water.
- Clear the discharge line to the outside.
- Place the pump back in position.
- Pour a bucket of water into the pit.
- Watch for quick pumping and shutoff.
- If it still does not run, replace the float or motor.
15. Flush Dirty or Discolored Water to Remove Rust and Sediment Build-Up
Dirty water indicates the presence of rust or sediment in your plumbing system. To fix it, flush the faucets and clean the water heater tank.
What to Check:
- Run only the cold tap for two minutes.
- If the color clears, the issue is in the heater.
- If the color stays, pipes may be rusted.
- Check if neighbours have the same issue due to the city’s water lines being repaired or flushed, not your own home plumbing.
How to Fix It
- Drain and flush the water heater until clear.
- Clean faucet aerators filled with sediment.
- Run each sink for five minutes.
- If water stays brown, schedule a pipeline inspection.
- Replace corroded copper or steel sections as needed.
- Install a sediment filter on the main line to prevent future problems.
Call Gottfried Plumbing for Emergency Plumbing Repairs
Our licensed plumbers handle all repairs with care. From fixing faucets and toilets to replacing burst pipes or tanks, our crew works quickly to protect your home from water damage. We offer same-day appointments and 24-hour emergency response.
Call (830) 331-2055 to fix emergency plumbing problems.
FAQs
How do I clear a clogged drain at home?
To clear a clogged drain, start by running hot water for a minute. Use a cup plunger to loosen debris, then flush again. Avoid chemical cleaners because they can damage drains and pipes.
What causes a plumbing leak and how can I stop it?
A plumbing leak usually comes from loose joints or worn washers. Turn off the nearby valve, dry the area, and tighten fittings gently. If leaks return, replace the damaged section or call for professional service.
How can I tell if a shut-off valve is bad?
A faulty valve may stick, spin freely, or drip around the stem. Turn it on and off several times. If it still leaks or won’t close fully, replace it with a new quarter-turn model.
Why do leaks keep coming back after small repairs?
Leaks often return when tape or sealant covers the leak, but you don’t fix the main cause. Corroded pipes, weak valves, or high water pressure can reopen the same spot. A licensed plumber can inspect and make lasting repairs.
How often should home plumbing repairs be done?
Plumbing repairs should be done as soon as leaks, slow drains, or noise appear. Annual checks on valves, drains, and toilets help catch minor issues early and prevent expensive damage.
Why do toilets sometimes leak around the base?
The toilet leaks at the base when the wax ring seal weakens or the bolts loosen. Shut off the valve, dry the area, and tighten the bolts gently. Replace the ring if water seeps again after flushing.